⚠️ Storable Easy only works with the online version of QuickBooks. If you are converting from QuickBooks Desktop to QuickBooks Online do NOT upload your customers (and their transaction history) from the Desktop to the Online version. This will make the future integration between the Storable Easy and QuickBooks Online difficult.
The Storable Easy software can only connect to QuickBooks Online Essentials, QuickBooks Online Plus and QuickBooks Online Advanced. The Storable Easy software cannot connect to QuickBooks Online Self-Employed or Quickbooks Online Simple Start.
How It Works
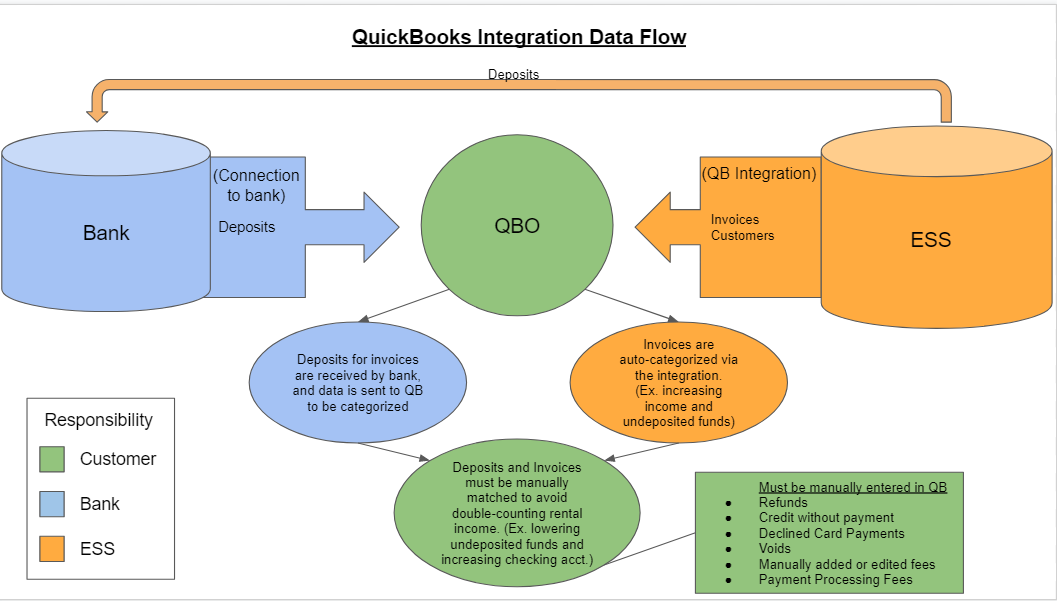
The integration transfers most day by day details from your Storable Easy software to QuickBooks automatically, but requires sifting through those details manually within both of those softwares. It is a free and optional self help service for facilities that use QuickBooks Online, operate on an accrual basis, and are looking to add a lot of detail to their books. Users of the integration are prepared to review each invoice and deposit twice: once within their Storable Easy software, and again in their QuickBooks Online account.
What will it do automatically?
The integration will automatically send invoices, transactions and customers into your QuickBooks, from your first day with Storable Easy to your most recent, and every day moving forward. From there, it will keep track of security deposits you hold, categorize your income into up to 5 different line items, and add to your accounts receivable.
What won’t it do?/ What will I have to do manually?
Each deposit and invoice must be matched to each other within QuickBooks, otherwise you might accidentally double count your income. During that matching process, any processing fees charged to those deposits will need to be manually entered. Additionally, any transactions that wouldn’t require the creation of an invoice on Storable Easy will need to be accounted for manually on QuickBooks (see diagram below for full list).
Pre-Integration
Questions to ask yourself before setting up an integration:
1. Is this the first time you’ve set up a QuickBooks integration with a facility?
If yes: Proceed to the next question.
If no: Using your discretion, you may skip other questions and proceed to setup steps.
Note: Only one Storable Easy software will connect with one QuickBooks Online. You cannot connect more than one Storable Easy software to one QuickBooks Online. See question 4.
2. Does your business operate on a cash basis?
If yes: Using the integration would create double the workload for no reason, we advise you to discuss connecting Storable Easy to QuickBooks Online with your accountant. After doing so, you may still integrate your two softwares if you wish. Next question.
If no: Proceed to the next question.
If you're unsure: Refer to the “Pre-Integration FAQs” question 2 for explanation.
3. Do you have a current QuickBooks Online subscription at the “Essentials” level or higher?
Note: QuickBooks Desktop (App), Simple Start (Online), and Self-Employed (Online) will not work. You will need QuickBooks Online Essentials or higher in order to integrate.
If yes: This is all that’s required to set up your connection. The Integration is not the best fit for everyone however, so you should review how the integration works, then consult with your bookkeeper or CPA before setting up the integration. Proceed to the next question.
If no:
- The Integration requires the “Essentials” online subscription level or higher, so you may need to change softwares or upgrade your QuickBooks Online subscription.
- The integration is not the best fit for everyone, so you should review how the integration works, then consult with your bookkeeper or CPA before setting up the integration. Next Question.
4. Is this QuickBooks Online account already integrated with another facility using Storable Easy?
If yes: You will need to purchase a separate subscription to QuickBooks Online, as the integration is exclusively a 1:1 connection. The Integration does not currently support class accounting between different locations on a single QuickBooks account.
If no: Proceed to the next question.
5. Do you already have customer accounts in your QuickBooks?
If yes:
- The integration will create duplicate customers and transactions, and will only feed new data to the new set of customer accounts. Your options from here include either:
- Setting up the integration first, then removing duplicate transactions one-by-one, before “merging” customer accounts. (You need to merge duplicate records, not just delete them. If you delete, that duplicate customer will reappear the next time they have data to sync over to QuickBooks Online. For instructions on Merging Data, see also QuickBooks Online Support: Merge Duplicate Accounts, Customers, or Vendors.)
- Removing current customer accounts before beginning the integration process.
(Note: We highly recommend you discuss these options with your local CPA/accountant before deciding, as both these options are cumbersome and complicated to do properly.)
If no: Proceed to “How the integration works” section.
Pre-Integration FAQs
Question 1: “How can I tell what version of QuickBooks Online I have?”
On your QuickBooks Online, click on the bubble with a letter in the top right corner, then “Manage your Intuit Account”, then “Products & Billing” on the left hand side. The QuickBooks Version will show in the middle of the screen under “Your Products”
Question 2: “What’s the difference between Cash Basis & Accrual Basis Accounting?”
Cash Basis: Income/expenses are recognized when money/cash changes hands.
Accrual Basis: Income/expense are recognized when service has been performed.
Question 3: “Is the Integration necessary to continue using Storable Easy?”
No. It’s fully optional.
Question 4: “How much does the integration cost?”
The integration is free.
Question 5: “Is there a time limit on when it can be connected or disconnected?”
No, it can be set up or disconnected at any time. Any data already sent to QuickBooks will not be automatically erased upon disconnection.
Question 6: “If I choose to not use the integration, do I still need QuickBooks Online Essentials?”
No, if you don’t integrate, you may continue using whatever bookkeeping software you like.
Question 7: “Can I choose the time period from which historical data is sent when we first set up the integration?”
No, the initial data push is all or nothing.
Question 8: “Will the taxable portion of my income be sent automatically to QuickBooks Online?”
No, but QuickBooks can track sales tax separately, and should be set up before starting the integration. Instructions included later in this document.
Note: Clients outside of the US will have to use the “Sales Tax Report”, and manually adjust for their different tax types.
Question 9: “What are my options if I choose not to integrate?”
QuickBooks Integration Set Up
Creating Linkable Accounts in Storable Easy
1. Log onto your Storable Easy Website.
2. In the toolbar at the top, hover over Setup, then click QuickBooks.
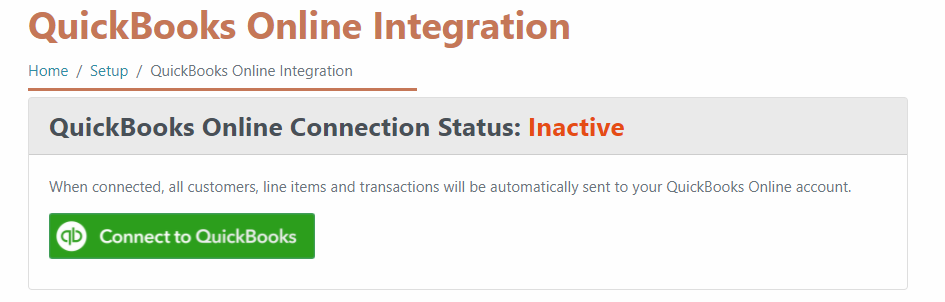
3. Click Connect to QuickBooks.
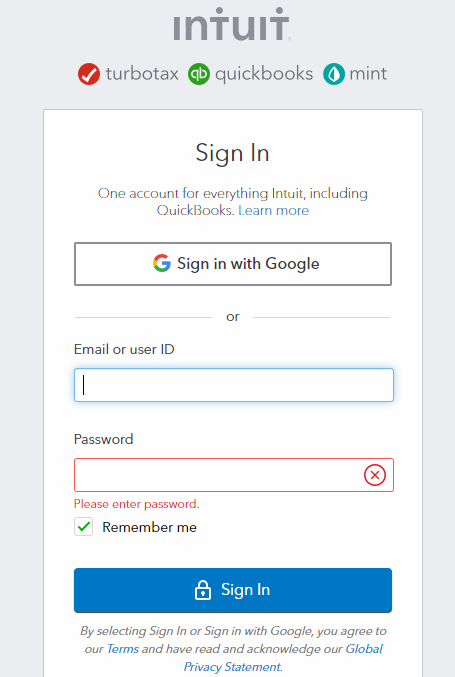
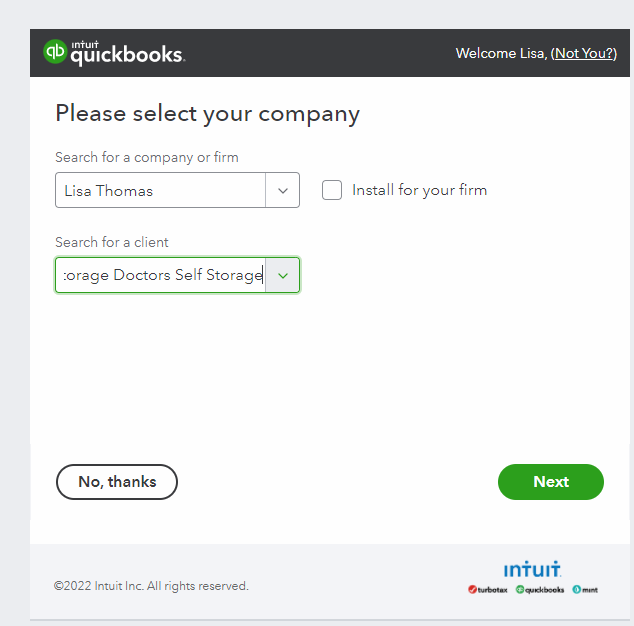
4. Log into your QuickBooks and choose which account to link to, then click Next.
5. Click the green Connect button.
6. The integration page should now look like the picture below. If so, open a new tab on your internet browser, then go to the QuickBooks login screen, and log into your company’s QuickBooks page. Keep both tabs open throughout the rest of the process.

Setting up Sales Tax
Do you charge sales tax at this location?
If no: Go to the next step.
If yes: Click on “Taxes” in the black toolbar on the left-hand side. (You might need to click the 3 bars in the top left to view the toolbar).
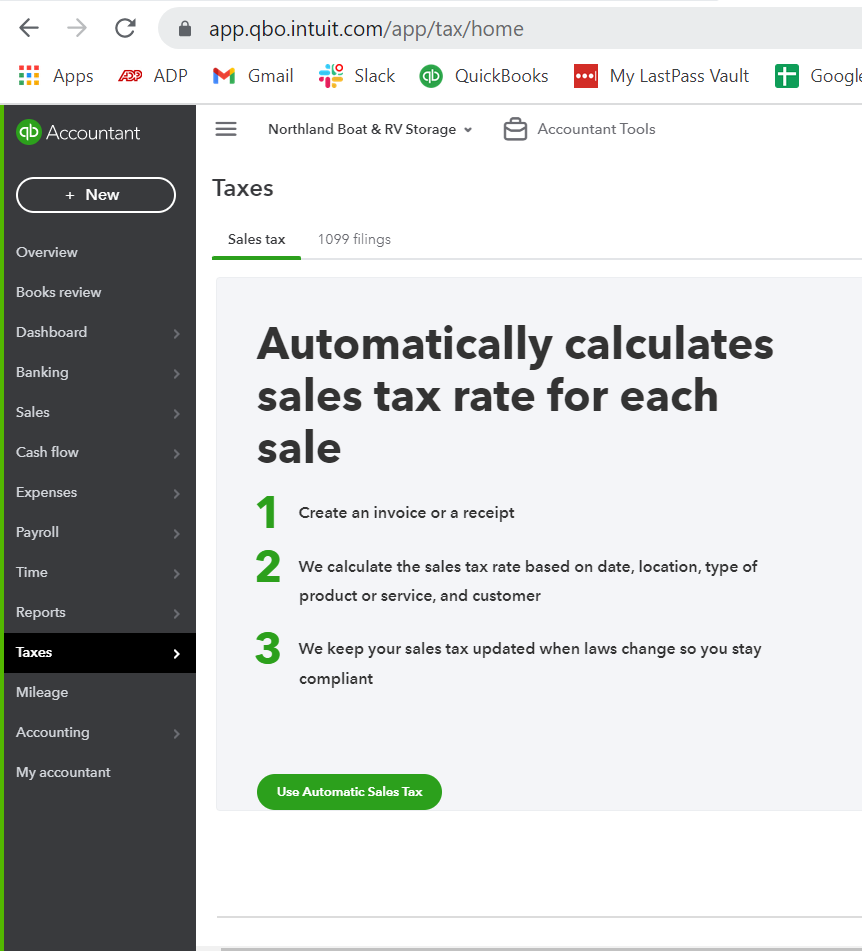
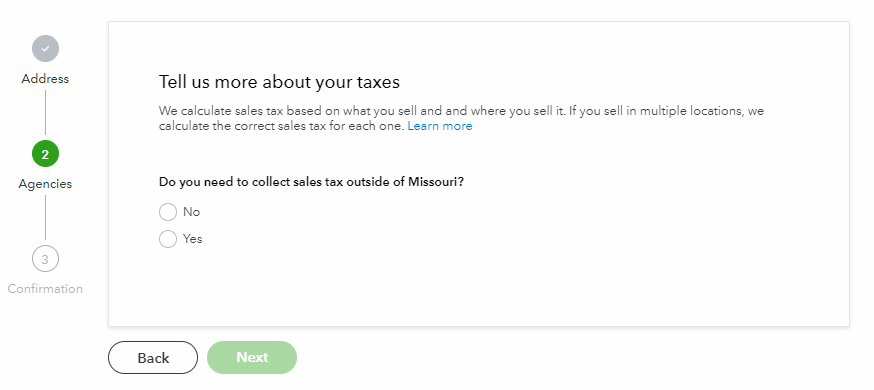
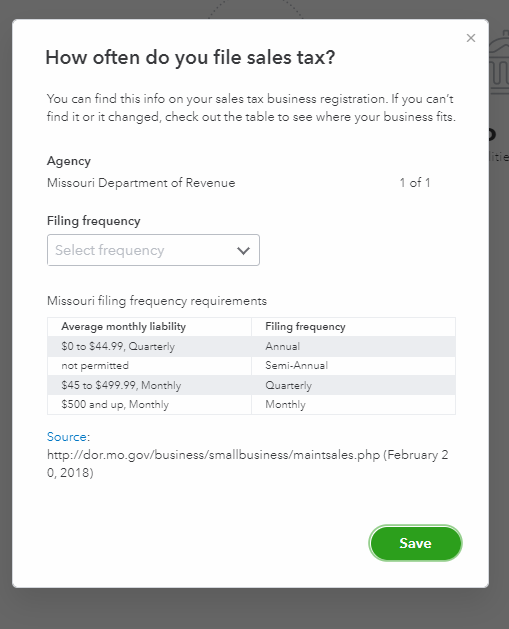
Fill in relevant information, ending with the filing frequency window

Creating Linkable Accounts in QuickBooks
1. Click on Sales or Invoicing in the toolbar on the left-hand side, then Products & Services.
2. Click the green New button in the top right, then Non-Inventory.
Note: “Non-Inventory” is the only type of Product/Service that will work correctly with the integration.

3. A window will open on the right side of the screen that looks like this. In the next step, you’ll begin creating services and accounts for data to feed into from Storable Easy.
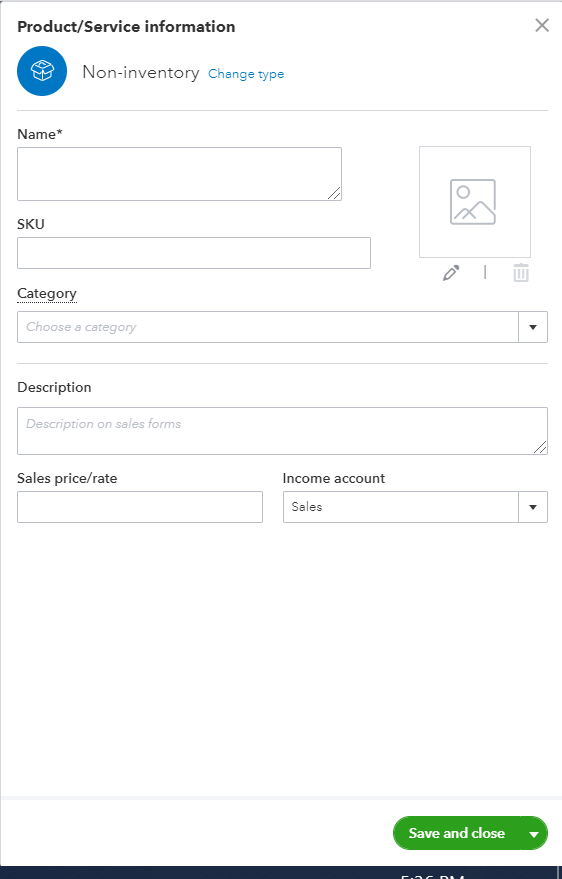
4. Follow along these steps, filling each field or clicking the appropriate buttons to create new Products/Services & Accounts to be connected to Storable Easy.

*4a. If you are using Tenant Insurance rather than Tenant Protection, follow this path instead:

5. Setting sales tax status for Products and Services during Integration setup.
a. Click Edit sales tax, then Still don’t see what you’re looking for?.
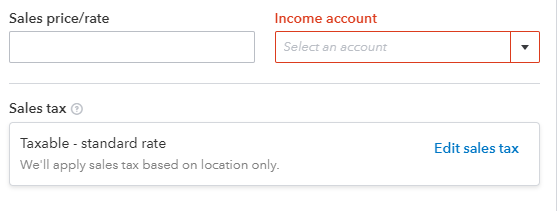

b. Click the Taxable or Nontaxable according to the table in the table in step 4 above.

Mapping Linkable Accounts, Activating the Integration
Now you’re ready to begin mapping out the integration page, and starting the initial data push of the integration.
1. Return to Storable Easy Tab on the web browser & refresh the page. The accounts you just made will now show up in the integration page, when you click any of the dropdown arrows.
2. Map each line item on the the page as follows:

3. Next, click Update Settings to activate the Integration. Then click Send All Unsent Information one time to confirm the initial data push has begun.
*Clicking the “Send All Unsent Information” button more than one at this time might cause the system to bottleneck and freeze up.
Congratulations! You’ve successfully set up an Storable Easy QuickBooks Integration!
Post-Integration
Matching Invoices to Deposits via Credit Card Payments on QuickBooks:
(This operation can’t be done unless your bank account has been connected to your QuickBooks AND you’ve completed the integration setup)
1. Click on Banking on the left side toolbar.
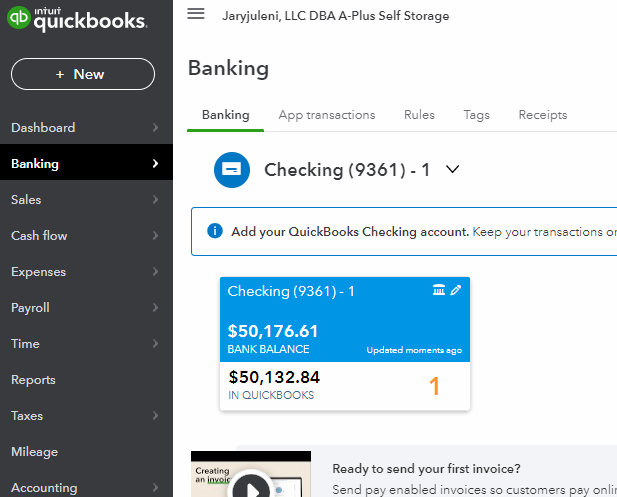
2. Click on the deposit you wish to match, then click the words Find Match next to the bubble.

3. While keeping the QuickBooks tab open, open a new tab and go to the client's Storable Easy reports. Under “Accounting/Financial”, open the “Payment Processing - Deposits” report.

4. Select the date range that matches the transaction in QuickBooks, then find the matching deposit on Storable Easy, according to the listed dates and amounts on the report. Click on the hyperlink date & time to view the breakdown of the deposit.

5. Using this breakdown, search the names of each customer on QuickBooks, find the corresponding invoice, and click the checkbox on the left hand side to match each invoice to the deposit.
(Some names may show up multiple times on separate invoices, be sure to match to the proper date, name, and amount in QuickBooks)
6. Once every invoice has been matched, verify the amounts shown here all match the Storable Easy report.
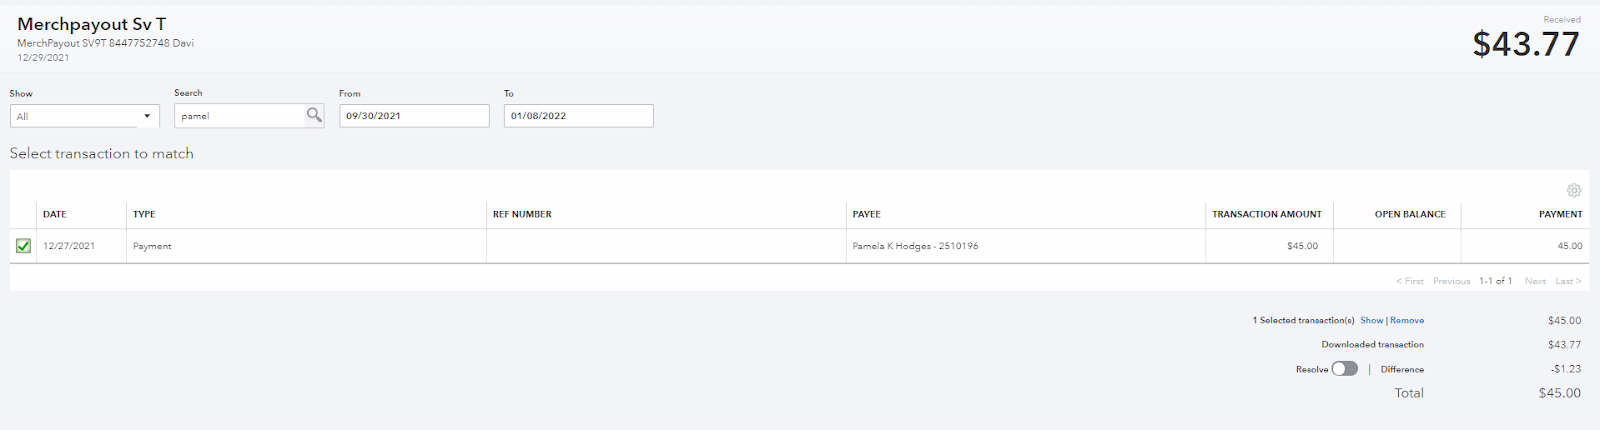
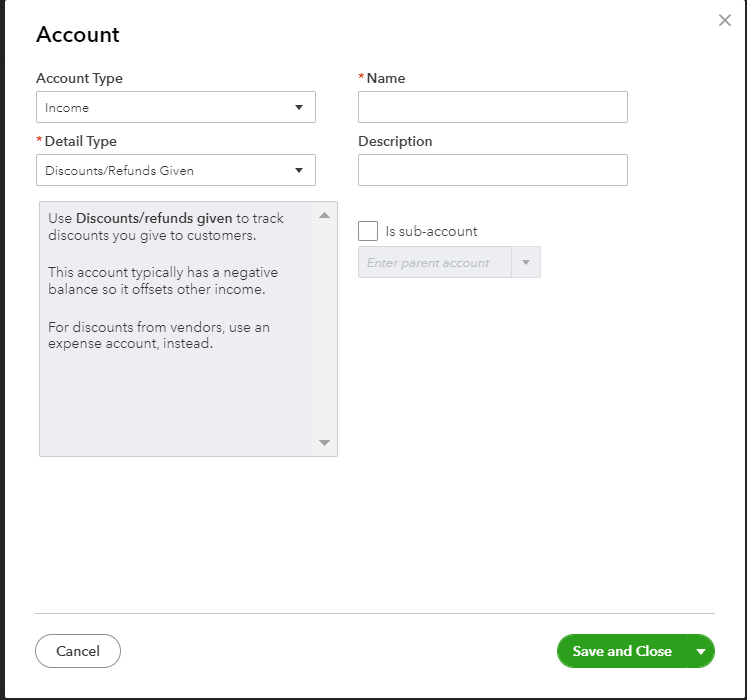
7. Scroll to the bottom of the page and click Resolve. From here, fill in the fields as follows:
Payee: “Storable Easy” (Add as new Vendor, if necessary)
Category: Either “Processing Fees” or “Merchant Fees” (Add as new Category, if necessary)
Account type: Expenses
Detail Type: Other Business Expense
*Name: Either “Processing Fees” or “Merchant Fees”
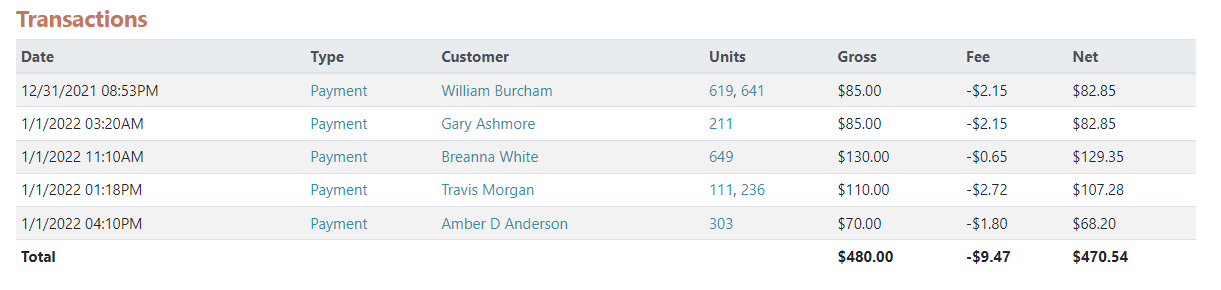
Amount: “-X.XX”,
The total processing fee for the deposit, according to the Storable Easy report, including the negative sign. See example below:

8. Lastly, click Save & Close in the bottom right corner.

9. Repeat process for all deposits via credit card payments.
Accounting for Transactions that aren’t sent to QuickBooks
1. Click on Sales or Invoicing on the left side toolbar, then click Customers.
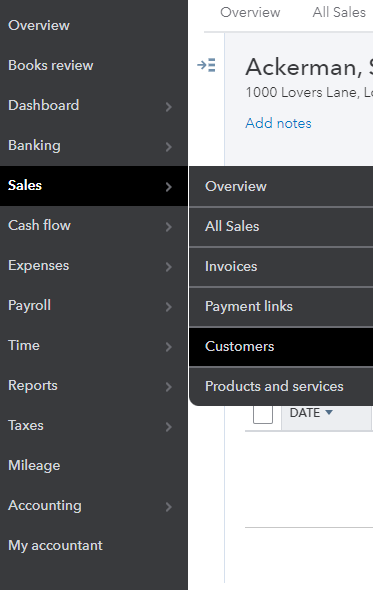
2. Search customer’s account by name, open it.
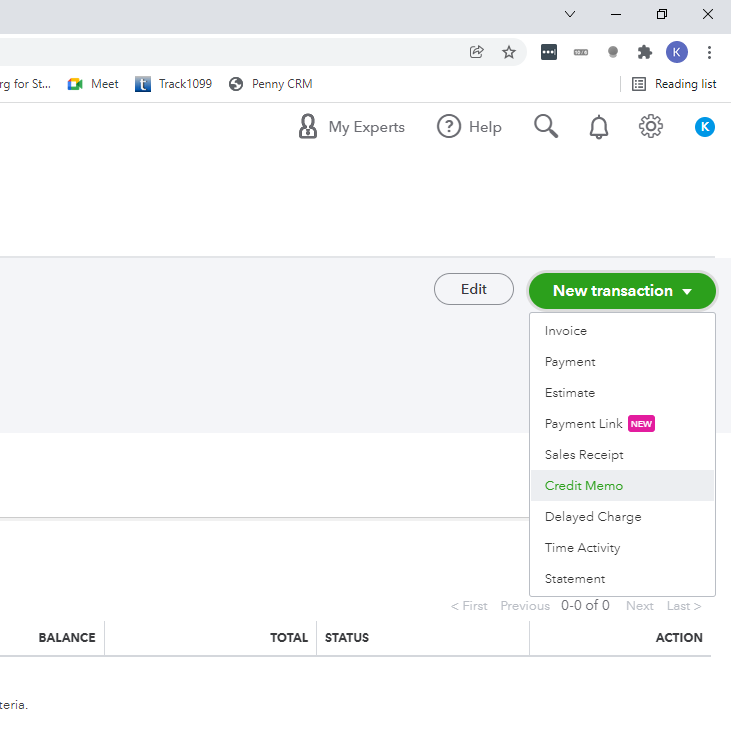
3. Click New Transaction then Credit Memo.
4. Under “Product/Service”, write in the type of service that was refunded (Late Fee, Rental Fee).
5. Fill in other fields for Quantity, Rate, & Amount.
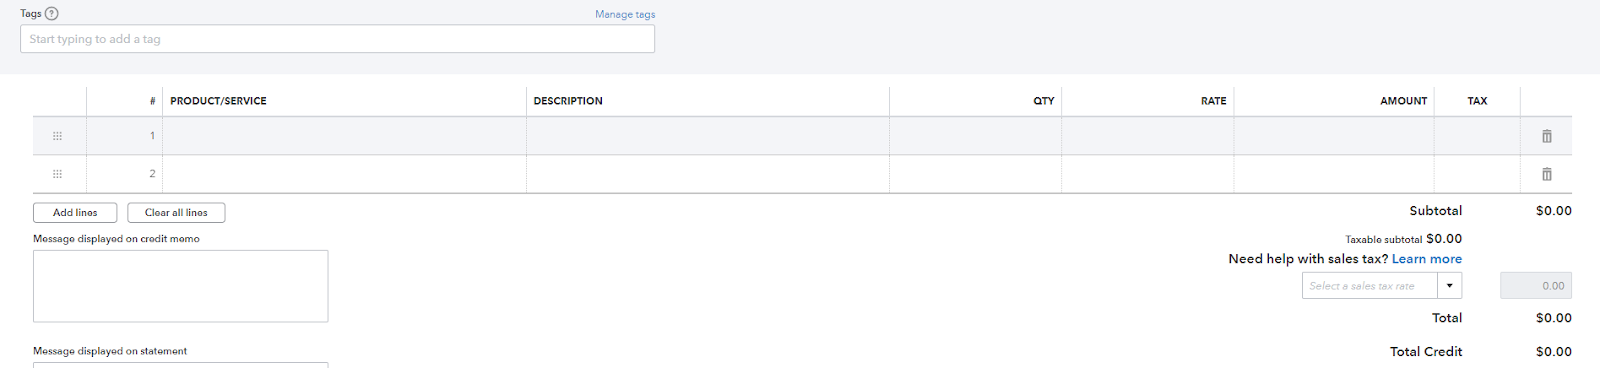
6. Click Save & Close in the bottom right (using the dropdown arrow if needed).
Troubleshooting Post-Integration
While there are many reasons an error could show on the QuickBooks Online Integration page, the buttons on this page may be the first step to addressing them.
Retry: Use this for any error message that includes the retry option.
- What will it do: Will attempt to push data into QuickBooks after a failed try. Won’t work on refunds.
- When not to use it: Refund errors (The retry button will never push these transactions over. Owners should account for them manually in QuickBooks, then dismiss them from the errors list)
Dismiss: Use this when dismiss is the only option shown for the error.
- What will it do: Will mark a transaction to never be sent, and remove it from the errors list.
- WARNING! Once an error is dismissed you will not be able to push that particular transaction over again. Be sure that this transaction is in the proper place in QuickBooks before dismissing.
- When not to use it: Error messages that allow a retry option or allow you to view the transaction should be addressed before dismissal. When in doubt, do not dismiss the transaction until you speak to a Storable Representative or your local CPA
Send All Unsent Information: Use this if you are not seeing a transaction hit your QuickBooks after at least 3 days and it’s not on the errors page.
- What will it do: Will attempt to push all unsent data into QuickBooks, including transactions that are not errors.
Reset the Integration: This should be used if the integration is already active, but the mapping section is blank and you're not receiving any data into your QuickBooks.
- Click Disconnect from QuickBooks, then repeat the steps from the Creating Linkable Accounts in QuickBooks and Mapping Linkable Accounts sections above.
- Please note: This should not be used often.
Post-Integration FAQs
Question 1: “How do I record credit card processing fees if Easy Payments takes out their percentage fee before I receive a deposit?”
These should be manually accounted for during the matching process, using the “Payment Processing - Deposits” report. To fix, see Matching Invoices to Deposits via Credit Card Payments on QuickBooks:
Question 2: “Why is my income being double counted after I categorize deposits from my bank?”
Invoices and Deposits are two sources showing the same transactions, and invoices are categorized automatically within the Integration data transfer, so categorizing deposits separately will create this issue. To fix, all you must “undo” those deposits within the banking tab, then see Matching Invoices to Deposits via Credit Card Payments on QuickBooks:
Question 3: “Why can’t I find a specific invoice to match with a deposit within my QuickBooks?
There could be multiple causes for this:
- The invoice hasn’t been sent from Storable Easy, and isn’t on the errors page.
- To fix: Click “Send all unsent information”, or just wait for the software to send the invoice naturally.
- The invoice has gotten stuck in transit, and is included on the errors page.
- To fix, see QuickBooks Integration Errors
- The invoice has been mistakenly matched to the wrong deposit.
- Invoice needs to be unmatched, then matched to the proper deposit. To fix, customers will need to consult with their local CPA.
Question 4: “Can I automate splitting up my taxable amounts from Storable Easy?”
No, all sales tax is sent to one account automatically, and must be split manually beyond that.
Question 5: “Is there any way to automate “matching” or accounting for processing fees?”
No. The process must be done manually.
Question 6: “Can I be charged a lump sum for processing fees at the end of the month rather than being charged per transaction?”
No. All credit card payments are processed and charged immediately, before the net deposit is sent to your bank account.
Question 7: “Can assign more than 5 income types for the integration to split automatically?”
No, the integration can only support 5 income types, each of which are explicitly defined on the “QuickBooks Online Integration” page on Storable Easy.
Question 8: "Why are invoices in QBO not including tax?"
The most common reason why sales tax wouldn't come over would be that QBO is not set up correctly.
QBO has to be set up to charge sales tax as well as Storable Easy. It has to be set up from both sides in order for it to work right.
Question 9: "Why are there duplicate payments?"
If the invoice has been marked as unsent on the QBO page.
There is a recurring transaction set up in QBO. One is from QBO and the other is from Storable Easy.
Disconnecting the Integration
1. Log onto your Storable Easy account, hover over Setup, click QuickBooks, then Disconnect from QuickBooks.

Additional Questions?
If your questions are not covered by this support article, please feel free to check out the QuickBooks Support Website for additional help and clarification.
https://quickbooks.intuit.com/learn-support/en-us